
Microsoft Teams meetings are much more than a way to jump on a video call. They are the central hub for teamwork, communication, and real productivity. The platform weaves chat, file sharing, and other collaboration tools right into the meeting itself, turning what used to be simple calls into dynamic work sessions.
From Clunky Calls to Seamless Collaboration

Let's ditch the old idea that Microsoft Teams is just another video call button on your screen. A better way to think of it is as the digital command center for your team's entire workflow, a space where conversations turn into actionable plans. For many remote and hybrid teams, it has become the absolute backbone of their day-to-day operations.
The shift to this way of working was incredibly fast and widespread. The numbers tell a dramatic story. In mid-March 2020, Teams users were racking up about 900 million meeting minutes in a single day. By the end of that same month, that number had exploded to 2.7 billion minutes daily. That’s a 200% jump, which just goes to show how quickly organizations had to adapt.
What Makes Teams Meetings So Different?
So, what's the big deal? Why Teams over any other tool? Its real power is its native integration with the entire Microsoft 365 ecosystem. This connection creates a smooth flow between your apps and tasks that most standalone video conferencing tools just can't match.
It's about having everything you need, right where you need it.
- Chat That Sticks Around: The meeting chat doesn't just vanish when the call ends. It stays put, creating a persistent log of the entire discussion, including all the links and files that were shared.
- Real-Time File Collaboration: You can open, share, and even co-edit Word docs, Excel sheets, and PowerPoint slides directly inside the meeting window. No more juggling screens or asking, "Can you see my screen now?"
- Effortless Scheduling: Because it's hooked directly into Outlook, scheduling a meeting is just a natural part of your existing calendar workflow, not a separate, clunky process.
The change from awkward calls to smooth collaboration is fundamentally about improving how we interact; explore a modern guide to improving workplace communication for broader context.
Knowing these core pieces is the first step to turning frustrating video calls into powerful opportunities for teamwork. This guide will walk you through everything you need to know, from the basics to the advanced features that make it all click.
Let's take a quick look at the core features you'll find inside a typical Teams meeting. This table breaks down the main functionalities and why they matter.
Microsoft Teams Meeting Features at a Glance
| Feature Category | Key Functionality | Primary Benefit |
|---|---|---|
| Video & Audio | High-definition video and audio, background blur/effects, noise suppression. | Creates a professional and focused meeting environment, reducing distractions. |
| Screen Sharing | Share your entire desktop, a specific window, or a PowerPoint presentation. | Allows for clear visual demonstrations and collaborative review of content. |
| Meeting Chat | Persistent, in-meeting chat that's saved with the meeting record. | Keeps a running log of conversations, links, and quick notes for future reference. |
| Recording & Transcription | Record meetings and generate a searchable transcript automatically. | Makes it easy for anyone who missed the meeting to catch up and find key decisions. |
| Breakout Rooms | Split participants into smaller groups for focused discussions or workshops. | Fosters better engagement and collaboration in large meetings. |
| Whiteboard | A shared digital canvas for brainstorming, drawing, and ideation. | Encourages creative thinking and visual problem-solving in real-time. |
This is just a snapshot, but it gives you a good sense of the tools at your disposal. By mastering these features, you can make every single meeting an opportunity for real progress.
How to Set Up Your First Teams Meeting
Getting your first Microsoft Teams meeting on the calendar is a pretty simple process. The platform gives you a couple of different ways to get a conversation started, so you can pick the method that works best for you, whether you're planning way ahead or just need to talk right now.
The most common way is to schedule a meeting right from the Teams calendar. If you've ever used a digital calendar before, this will feel immediately familiar, and it keeps everything you're doing right inside the Teams app. It's the perfect approach for organizing formal discussions where you have a clear agenda and a set list of people to invite.
Another popular route is using the Microsoft Teams Meeting add-in for Outlook. If your entire workday lives inside your Outlook inbox and calendar, this is easily the most natural way to set up a call. You can create a meeting invite just like any other appointment, and the Teams link gets added for you automatically.
Scheduling a Standard Meeting
Let's walk through the most common method: scheduling from inside the Teams app itself. This approach puts you in the driver's seat, giving you full control over all the meeting details in one spot.
- Head to the Calendar: Open your Teams app and click the Calendar icon over on the left-hand navigation bar.
- Create a New Meeting: Look for the + New meeting button in the top-right corner and give it a click.
- Fill in the Details: A scheduling form will pop up. This is where you'll add the meeting title, invite your required and optional attendees, and pick the date and time. You can also set it up as a recurring meeting if it's something that happens regularly.
- Add a Channel (Optional): You can link the meeting to a specific Teams channel. This is a fantastic trick for project-specific calls because it posts the invitation right in the channel and keeps the chat history and any recordings there for easy access later.
- Send the Invitation: Once you've filled everything out, just click Send. The invitation zips off to your attendees and lands on their calendars.
For those spur-of-the-moment chats that don't need a formal invitation, Teams has the Meet Now feature. This lets you kick off an instant meeting and pull people in as you go, perfect for quick problem-solving sessions.
Configuring Your Meeting Options
After the invitation is out the door, you can and should fine-tune the settings to control the meeting environment. This is a critical step for making sure your call is secure and runs smoothly without any hitches. To get to these settings, just open the meeting from your Teams calendar and select Meeting options.
This infographic breaks down the simple, three-step flow for setting up a properly configured meeting.
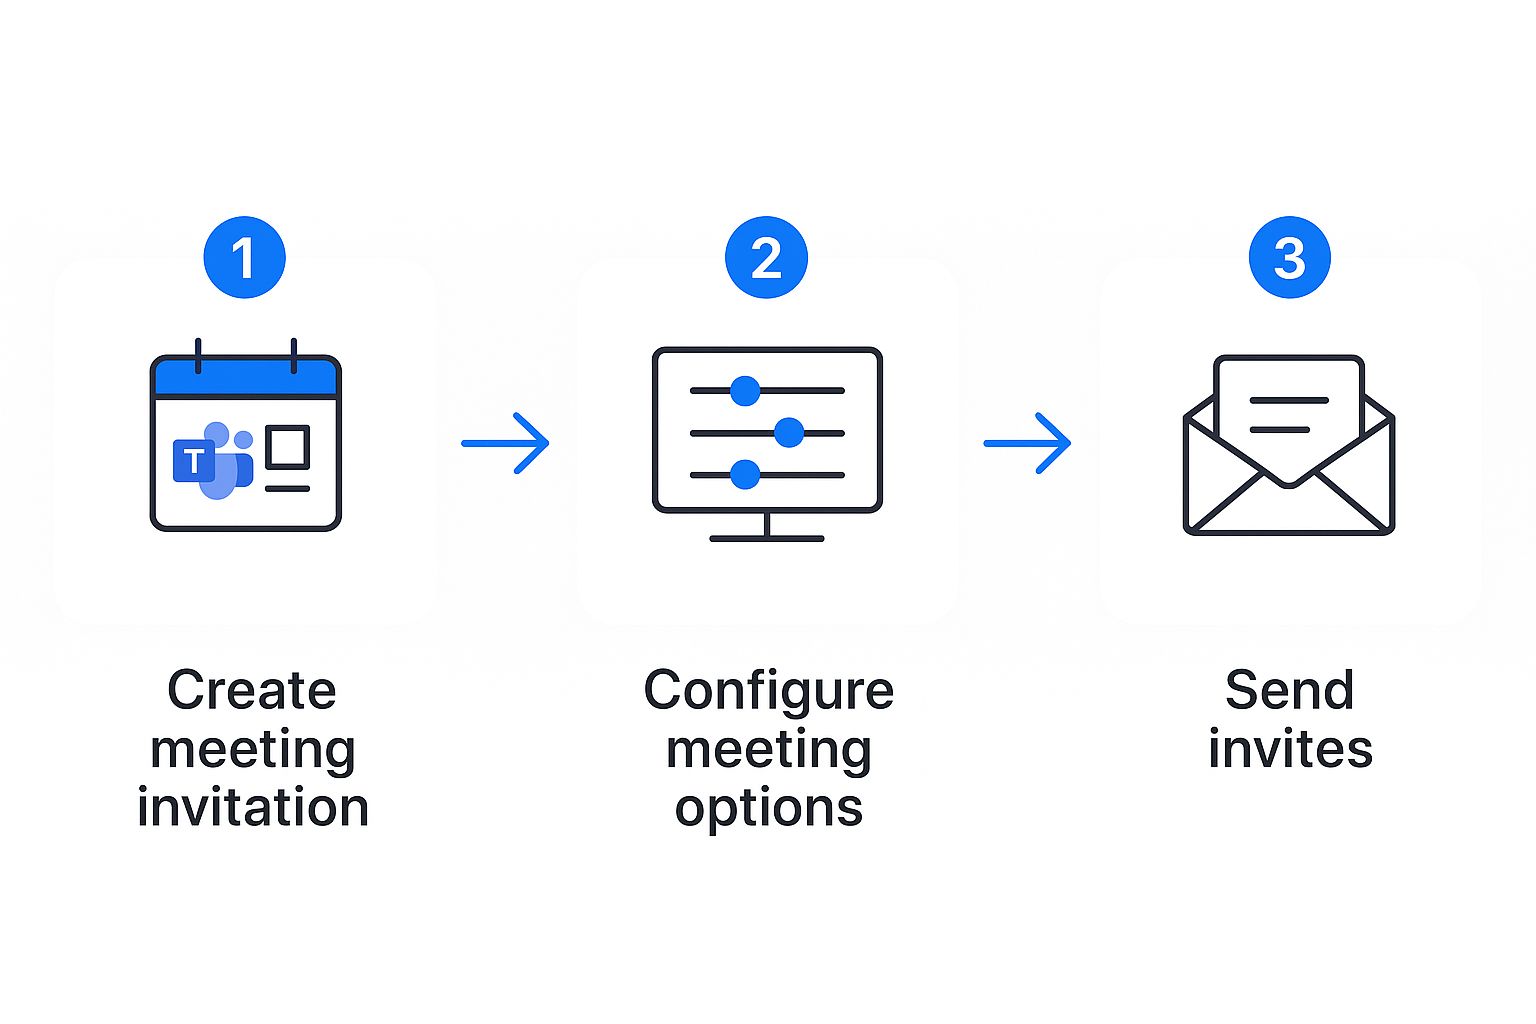
As you can see, creating the invitation is just the start. Taking a moment to configure the options is what really sets you up for a controlled, professional session.
Here are a few of the key settings you'll want to adjust:
- Who can bypass the lobby? This setting is all about who gets to join the meeting directly versus who has to wait for you to let them in. For internal meetings, you might let everyone in your organization bypass it. For calls with clients or external partners, you will likely want everyone to wait in the lobby.
- Who can present? By default, everyone can share their screen. To avoid any accidental (and sometimes embarrassing) screen sharing, it's a good idea to limit this to specific people or just yourself. You can always grant presenter rights to an attendee during the meeting if needed.
- Allow mic and camera for attendees? To keep interruptions to a minimum, especially in large meetings, you can disable microphones and cameras for all attendees when they join. They can always be re-enabled later.
Getting these settings right from the start establishes a sense of order and nips common distractions in the bud. It lets you focus on the conversation instead of playing traffic cop with all the participants.
Mastering these setup steps is fundamental to a good meeting. For even more tips on running organized and productive calls, you can also learn how to use Microsoft Teams effectively in our detailed guide. A properly set-up meeting is the first, and most important, step toward a successful outcome.
Using Core Features for Productive Meetings

Alright, everyone's in the meeting and the pleasantries are over. Now what? This is the moment where a Microsoft Teams meeting needs to become more than just a call, it needs to transform into a dynamic workspace.
Knowing your way around the core features is what separates a chaotic, rambling call from a productive session. These tools are there to keep everyone aligned, engaged, and focused on why you all gathered in the first place.
Mastering Screen Sharing and Presentations
Sharing your screen is probably one of the most basic actions in any virtual meeting. But Teams gives you a few different ways to do it, and each one has its place. You can share your entire desktop, a single application window, or use PowerPoint Live for a much slicker presentation.
For most day-to-day tasks, sharing a single window is your best bet. It keeps everyone’s attention exactly where you want it and saves them from seeing your email notifications pop up mid-sentence.
But when it's time to present, PowerPoint Live is a game-changer. Instead of just broadcasting your slideshow, this feature bakes the presentation right into the meeting. Attendees can quietly navigate slides on their own if they need to, and you get a special presenter view with your notes and a slide sorter.
Keeping the Conversation Organized
A good discussion needs structure. Without it, you get conversations that veer off-track or get dominated by the loudest voices in the virtual room. Teams has some simple but powerful tools to keep things flowing smoothly.
- Raise Hand: This creates a virtual queue, letting people signal they have something to say without interrupting. It's an elegant way to make sure everyone gets a turn.
- Muting Controls: As the organizer, you have the power to mute individuals or everyone at once. This is a lifesaver for cutting out background noise or just resetting the focus during a big presentation.
- Meeting Chat: The chat sidebar is perfect for dropping in links, asking quick questions, or adding context without derailing the person who's speaking.
To make sure all this great discussion leads to actual results, it’s important to capture key points and action items. Taking a look at proven meeting minutes best practices can help turn your conversations into concrete outcomes.
Driving Real-Time Collaboration
Beyond just talking and presenting, Teams is built for getting work done together. Two features, in particular, turn a passive viewing experience into an interactive workshop: file sharing and the digital whiteboard.
You can drop files directly into the meeting chat, giving everyone instant access to the documents you're discussing. People can even open and co-edit Office files right inside the Teams window, making real-time updates a breeze.
Then there's the Microsoft Whiteboard. Think of it as a shared digital canvas for brainstorming. Everyone can jump in to add sticky notes, sketch out diagrams, and visualize ideas as a group. It's fantastic for creative sessions and mapping out complex workflows.
The modern workplace has its own set of challenges, too. With teams scattered across the globe, scheduling is trickier than ever. In fact, nearly one-third of all meetings now span multiple time zones, a figure that's shot up by 35% since 2021. This often means meetings are happening at odd hours, with a 16% year-over-year increase in calls after 8:00 pm.
By using these core features thoughtfully, you can run meetings that are collaborative events that respect everyone’s time and drive real progress.
Ready to take your Microsoft Teams meetings from standard to standout? It’s time to move beyond the basics.
Teams has several advanced tools built right in, designed to help you create a more polished, professional, and engaging experience for everyone on the call. Mastering these features can completely change how your audience sees your presentations.
One of the simplest yet most powerful tools is the ability to tweak your own appearance. You can use background blur to instantly hide a messy home office or a distracting environment, putting the focus squarely on you.
For an even more polished look, you can upload a custom or branded background image. This small detail projects a real sense of professionalism and brand consistency, which is especially important on client-facing calls.
Of course, professional presentations are about more than just visuals; they're about proper meeting conduct, too. To make sure things run smoothly, it helps to review key guidelines. Our guide on Microsoft Teams etiquette provides 20 dos and don'ts that can help you maintain a polished atmosphere from start to finish.
Dynamic Presenter Modes
To really capture your audience's attention, you need to be more than just a voice narrating a slide deck. Presenter modes in Teams were built to make your delivery more dynamic and visually interesting. Instead of having to choose between showing your face or your content, you can now do both at the same time.
- Standout Mode: This mode overlays your video feed on top of your shared content. You'll appear in the corner of the screen, almost like a news anchor. It’s a great way to keep your face visible, maintaining that personal connection while your audience follows along with your slides.
- Reporter Mode: Think of a news-style broadcast where your content appears just over your shoulder. This mode is perfect for making important announcements or presenting data where you want to add that professional, report-like visual context.
- Side-by-side Mode: Just like it sounds, this option displays your video feed right next to your shared content. It gives equal weight to both you and your presentation material, which creates a nice, balanced, and collaborative feel.
Using these modes helps break up the monotony of a typical screen share, keeping your audience way more engaged with both you and your message.
Making Meetings More Accessible and Useful
Beyond the visual polish, some of the most powerful advanced tools are all about making your meetings more inclusive and creating a lasting record of the conversation. Live captions and transcription are two fantastic examples that hit both of these marks.
When you turn them on, live captions display what’s being said in real-time at the bottom of the screen. This is a huge help for participants who are hard of hearing or for anyone trying to tune in from a noisy coffee shop. It also helps anyone who isn't a native speaker of the language being used in the meeting.
The meeting transcription feature takes this a giant leap further. It creates a complete, time-stamped, and speaker-identified text file of the entire conversation. After the meeting, this transcript becomes a searchable document, making it incredibly easy to find specific decisions or comments without having to re-watch the whole recording.
This searchable record is an unbelievably valuable asset. You can quickly track down action items, pull exact quotes, or review a complex discussion. It transforms a one-time event into a permanent, accessible knowledge base for your whole team.
For those highly polished or pre-recorded segments, exploring tools and strategies for recording presentations with voice-over can really elevate your content.
Facilitating Focused Group Discussions
For larger meetings or interactive workshops, keeping everyone engaged is always a challenge. That's where breakout rooms come in. This tool lets the meeting organizer split the main meeting into several smaller, separate sessions.
You can automatically or manually assign people to different rooms for focused discussions, brainstorming sessions, or small-group training exercises. As the organizer, you can pop in and out of the different rooms to check on progress and then bring everyone back to the main session with a single click. Breakout rooms make large-scale collaboration not just possible, but genuinely productive, all within a single Teams meeting.
Connect Website Chat to Teams Meetings

Microsoft Teams is fantastic for keeping your internal teams connected, but its real power is unlocked when you bridge it with the outside world, like your customer service.
Imagine this: a visitor is browsing your website, has a complex question, and within minutes is on a face-to-face video call with one of your experts. This isn't some far-off idea. It's a practical, powerful workflow you can set up right now.
This is all about closing the gap between automated support and a high-touch, personal experience. By integrating a live chat tool like Social Intents with Microsoft Teams, you can put an intelligent chatbot on your website. This bot is great for answering common questions on its own, but its most important job is knowing when a human touch is required.
When a customer's query gets too tricky for the bot, the system can instantly push a live chat request into a specific channel right inside your team's workspace. This creates a completely smooth path from a simple website chat to a full-blown Microsoft Teams meeting, dramatically cutting down resolution time and making customers a whole lot happier.
How the Chat-to-Meeting Workflow Operates
The entire process is designed to feel effortless for both your customer and your support agents. It starts with a simple chat on your website and can escalate to a personal video call without ever forcing the customer to switch apps or explain their problem all over again.
Here’s how it breaks down:
- A Customer Starts a Chat: A visitor on your website has a question and starts typing in the AI-powered chatbot window. The bot handles the initial questions and gathers some basic info.
- The Chatbot Identifies a Need: The bot's logic determines the customer’s issue needs a real person. This might be triggered by certain keywords, the complexity of the question, or even a direct request to speak with an agent.
- A Request is Sent to Teams: The chatbot zaps a notification straight into a pre-assigned Teams channel. This alert includes the full chat transcript, so your agent has all the context they need.
- An Agent Accepts the Chat: A team member sees the incoming request, clicks to accept, and immediately opens a private chat with the website visitor, all from within Teams.
- A Meeting is Initiated: If the issue could be solved faster with a screen share or a more in-depth conversation, the agent can launch a Microsoft Teams meeting with a single click, directly from that chat window.
This screenshot shows exactly what it looks like, a live chat request pops up right in a Teams channel, ready for an agent to jump in. The magic here is the seamlessness. The agent never has to leave their primary workspace, which is a massive boost for efficiency and response times.
The Value of Direct Escalation
So, why is this workflow so effective? It’s simple: it meets customers exactly where they are and gives them a frictionless path to the help they need. Instead of getting trapped in a frustrating automated loop, they're quickly connected to a real person who can actually solve their problem. That immediate, personal connection can be a huge differentiator for your business.
This kind of integration turns your website from a static brochure into a dynamic, interactive front door for your business. It lets you offer real-time, high-value support that builds genuine trust and loyalty.
The sheer scale of Teams makes it the perfect hub for these kinds of interactions. The platform's reliability is rock-solid, which is important when you consider its staggering daily usage. In fact, projections for 2025 show that 1.875 million meeting minutes are logged every single minute on Microsoft Teams. That adds up to nearly 2.7 billion meeting minutes per day. This massive infrastructure is exactly why you can count on it to be a dependable backbone for your customer communications.
Hooking your chat into Teams is just one way to extend its power. If you’re looking for more ways to get your favorite apps talking to each other, you should check out our guide on 30 must-have Microsoft Teams integrations to simplify your workflows. When you start bringing your different tools together, you create a far more cohesive and productive hub for your entire organization.
Common Questions About Microsoft Teams Meetings
Even with Teams being everywhere these days, plenty of people still have questions about how to get the most out of it. Let's tackle some of the most common ones and clear up any confusion about its features and how to handle frequent challenges.
Can I Join a Microsoft Teams Meeting Without an Account?
Yes, absolutely. You can jump into a meeting as a guest without needing a Microsoft account.
When you click a meeting invitation link, Teams will ask if you want to join on the web or download the desktop app. If you go with the web option, you just type in your name and you're in, no sign-in required.
Just keep in mind that some organizations lock things down with specific security settings that might restrict guest access. While most companies allow it, you might run into an internal policy that requires all attendees to be logged in.
How Do I Record a Teams Meeting and Find the File?
To record a meeting, you have to be the organizer or someone else from the same company. Once the meeting starts, just look for the control bar, click More actions (the icon with three dots), and then hit Start recording.
As soon as you do, everyone in the meeting gets a notification that the recording has started. This is great for transparency, and the notice also pops up in the meeting's chat history.
After the call is over, Teams processes the video and saves it. Where it ends up depends on what kind of meeting it was.
- For Channel Meetings: The recording lands in a Recordings folder right inside the Files tab of that specific channel. This keeps everything neatly organized and easy for the whole team to find.
- For All Other Meetings: The file is saved to the Recordings folder in the OneDrive of whoever hit the record button. They'll get an email with a link to the video as soon as it's ready to watch or share.
What Is the Maximum Number of People in a Teams Meeting?
The participant limit for a Microsoft Teams meeting really comes down to your license, but there's a standard cap for most business plans. A typical interactive meeting can host up to 1,000 participants who can all use their mics, cameras, and the chat.
If you happen to go over that 1,000-person limit, Teams automatically flips into a "view-only" mode. This lets up to 10,000 additional attendees watch the presentation, though they won't be able to interact.
For truly massive audiences, Microsoft also offers Teams Live Events. These are built for one-way broadcasts and can support up to 100,000 attendees, but they feel much more like a webinar than a collaborative meeting.
The AI-driven features in Teams Premium, like Intelligent Recap, are changing how we think about meeting attendance. By automatically generating notes, chapters, and action items, it becomes much easier for someone who missed a meeting to catch up. This makes asynchronous work more efficient and effective.
This is a game-changer for global teams spread across different time zones. An employee can just scan an AI-generated summary instead of having to sit through a full hour-long recording.
How Can I Reduce Background Noise During a Meeting?
Few things are more distracting than background noise on a call. Luckily, Teams has a surprisingly effective noise suppression feature built right in to keep your audio crisp and professional.
To switch it on, click your profile picture in the top-right of the Teams app and head to Settings. From there, choose the Devices tab, and you'll see a dropdown menu for Noise suppression.
You've got a few options here:
- Auto (Default): Teams listens to your environment and picks the best level of suppression on its own. This works great for most people.
- High: This is your best bet for filtering out unpredictable sounds like a barking dog, a crying baby, or that one person with the super loud keyboard. It's powerful but does use a bit more of your computer's processing power.
- Low: This setting is perfect for knocking out consistent, low-level hums like a computer fan or an air conditioner.
Beyond the software settings, one of the best things you can do is use a quality headset with a dedicated microphone. A good headset physically isolates your voice and blocks out a ton of surrounding noise, making a massive difference in how you sound to everyone else in your Microsoft Teams meetings.
Ready to bridge the gap between your website and your internal team? Social Intents integrates directly with Microsoft Teams, allowing your AI chatbot to escalate complex conversations into live chats and even video meetings. Turn every customer query into an opportunity for a meaningful, personal connection. Start your free trial with Social Intents today!
